As promised, here is the tutorial for my
original block design which I have called Migration. For those new readers (or those of you who don't recall), this block was created as part of a monthly challenge hosted by Candi at
Raccoon Creek Quilts.
I dreamed up this block during the month of November, which happened to be when the migration of Canadian geese was occuring in my area. Usually this happens sooner, but the weather was so nice through the start of winter, they stuck around a little longer this year. I have always based the change in seasons on the migration of the geese and really do look forward to their return in the spring.
My test block was done in prints from my scrap drawer. I knew I wanted to use solids for the tutorial, but this really is a scrap friendly block. It is a variation of the pineapple block, but I decided to give it some depth by varying the size of the strips around the center square. To enchance the effect of the geese flying, I used a gradation of grays and blues.
I have to warn you that the photos I took are not true to color. It snowed all day today (booo!) and was so gray. I will be turning this block into a final project which I will shoot in natural daylight.
To create this 12.5" (unfinished) block, you will need either scraps or fat quarters. There will be some extra with fat quarters, by the way.
Materials:
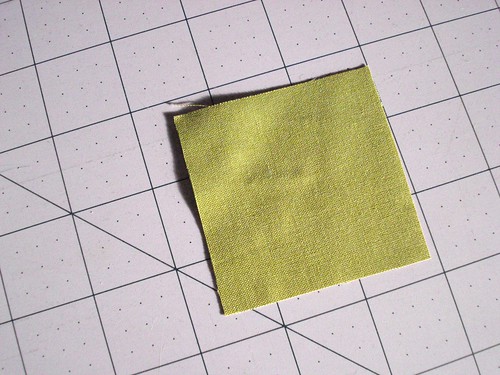
One 2.5" square in Kona Olive
One 1.5x18" strip in Kona Sky
Four 2.5" squares in Kona Pepper
Two 2x18" strips in Kona Evening
Four 3.5" squares in Kona Coal
Three 3x18" strips in Kona Windsor
Four 5.5" squares in Kona Ash

All seams are 1/4" unless otherwise stated.
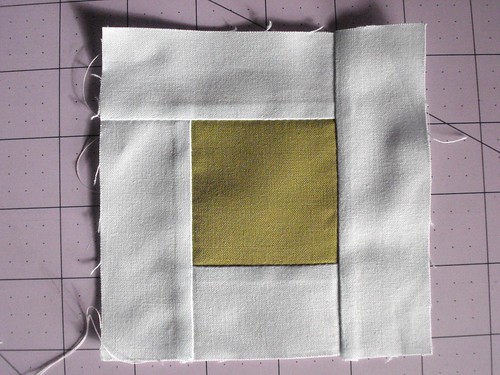
Basically, this starts out like a log cabin block. When I sew one of those up, I don't cut each strip to size. If you like to do that, feel free. I just sew it to each side and trim it off as I go.
So starting with the center square, attach the first side using the 1.5" strip and trim off the rest of the strip. Press the seam to the outside strip (or if prefer to press it open, go ahead).

Continue attaching each side and pressing as above until you have sewed all four.
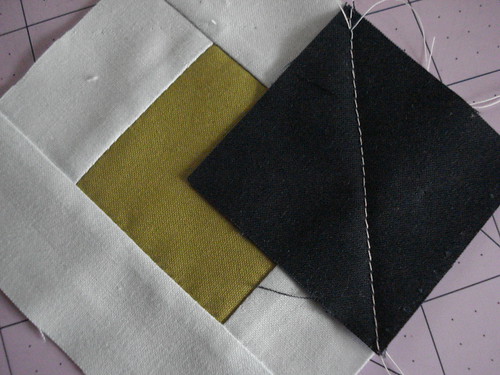
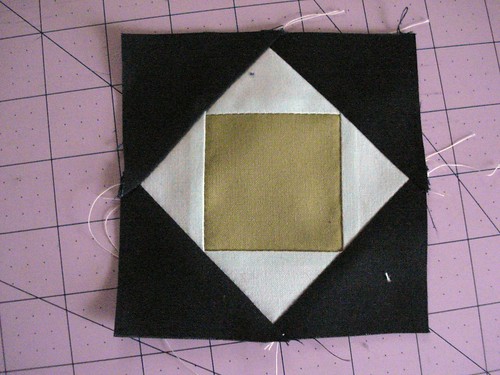
Now to attach the four corner geese, I start with a 2.5" square. I know there are other methods, but this works best as I'm not fussing with the bias. I mark the diagonal by pressing it so I can sew in the ditch, but you may like to mark it with a drawing tool.

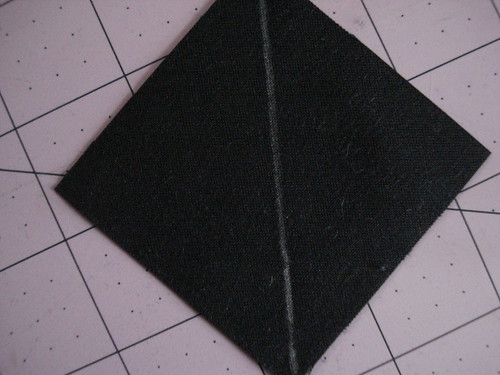
Line up the corners so that the line you will be stitching cuts across the corner of the block.
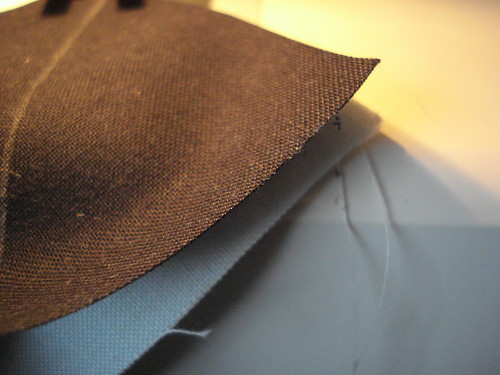
I forgot to pin the two together and it slipped. I don't usually pin anything with piecing a quilt, but it definately helped for attaching the corner geese. (And yes, the photo of the pinned piece is from a later step.)

Now you will stitch along the line/in the ditch created by pressing.

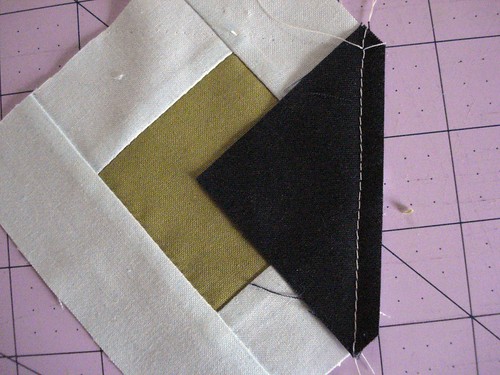
This is what you will end up with.
Now trim the seam allowance to 1/4" and press towards the corner.
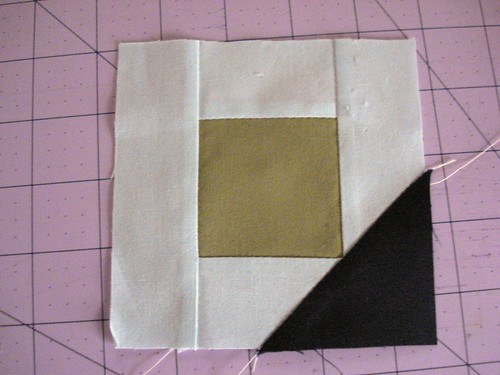
Repeat with the other three corner triangles and this is what it will look like. There will be a slight overlap of the corners.
Next you will take the 2" strip and repeat the process for attaching it.
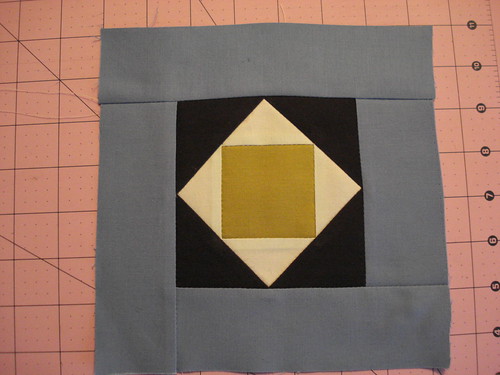
Next add the 3.5" squares as above, followed by the 3" strips and then adding in the 5.5" squares. I forget to take a photo of those steps so I hope the instructions are clear enough above.
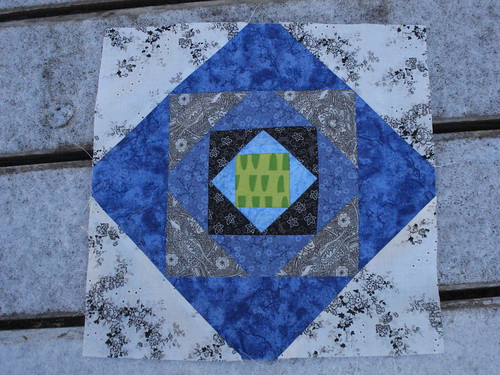
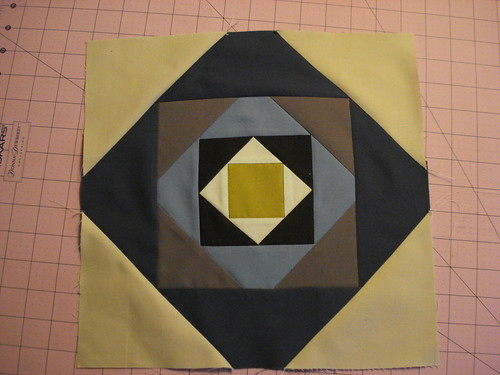
Your final block will look like this.
I hope that was clear enough. Feel free to ask any questions if you have them. If you make one of these, please let me know. I would love to see your version!
Writing this tutorial was certainly interesting and took longer than I thought. I guess I didn't believe anyone else who has said the same!
ETA: Linking this up over at Lawson and Lotti for their new weekly linky party: Tutorial Tuesday.
Stay tuned for my recap and tomorrow my goals for 2012. I have plans to organize my sewing space tonight and to be working on projects both Sunday and Monday (day off!), so I should have some finishes to share this week. One of which will be what I made with this block.

4 comments:
Very clear instructions, Katie! It's fascinating seeing how it all goes together. I've just signed up for my first QAL and am looking forward to it.
I love how this looks in solids and the instructions are great!
Oh!!! That's easier than it looked - great instructions! :)
Great tut Katie. I love your block and it looks fab in those solids. Thanks for linking up, Im so glad I wasn't alone for my first link up ;-)
Post a Comment